I’ve been making my own face masks for five years. Not because I’m crunchy — because I got tired of spending $60 on a jar of something that smelled like a fancy lab and did nothing. After testing roughly 40 recipes, I can tell you exactly which ingredients pull their weight and which ones are just kitchen waste on your face.
Here’s the short version: DIY anti-aging face masks work when you respect the chemistry. Slap an avocado on your face and you’re moisturizing. Add the wrong acid and you’re burning. I’ve done both. Let me save you the mistakes.
Why Most DIY Anti-Aging Masks Fail (And How to Fix It)
The biggest lie in natural skincare is that more ingredients = better results. I see recipes with 12 different things in one bowl. That’s not a mask — that’s a salad. Your skin can only absorb so much at once.
Three reasons homemade masks fail:
- Wrong pH. Your skin sits at pH 4.5-5.5. Lemon juice is pH 2. Straight lemon burns. Always dilute.
- Particle size. Ground oatmeal needs to be powder-fine. Chunks scratch your face.
- Freshness. A mask made Sunday is garbage by Tuesday. Bacteria love wet organic matter.
The fix is simple: Pick one active ingredient per mask. Add a base. Use it immediately. Throw away leftovers.
I ruined a week of skin trying a turmeric-honey-lemon-yogurt-oatmeal mash-up. My face turned orange and angry. Now I keep it to two or three ingredients max. Your skin will thank you.
| Common Mistake | Why It’s Bad | What to Do Instead |
|---|---|---|
| Using lemon juice undiluted | pH 2 — burns, causes hyperpigmentation | Dilute 1:4 with water or yogurt |
| Leaving mask on too long | Over-exfoliation, barrier damage | Set a timer. 10-15 minutes max. |
| Storing leftover mask | Bacterial growth in 2-3 hours | Make fresh each time. No exceptions. |
6 DIY Anti-Aging Face Masks I Actually Use (Ranked by Results)
These aren’t Pinterest fantasies. I’ve made each mask at least 10 times. I’ve changed ratios, tested different ingredient sources, and tracked what happens to my skin the next day. These six are the only ones that earned a permanent spot in my rotation.
1. The Oatmeal + Honey + Milk Mask (For Sensitive Skin)
What it does: Calms redness, gently exfoliates, moisturizes without clogging pores.
The recipe: 1 tablespoon finely ground oatmeal (blitz it in a coffee grinder until it’s flour), 1 teaspoon raw honey, 1 tablespoon whole milk. Mix into a paste. Apply. Leave 15 minutes. Rinse with warm water.
Why it works: Oatmeal contains avenanthramides — compounds that reduce inflammation. Honey is a humectant that pulls moisture into skin. Milk provides lactic acid, a gentle alpha hydroxy acid that exfoliates without irritation.
My verdict: This is the only mask I use the day after a chemical peel. It’s gentle enough for rosacea-prone skin. Don’t use colloidal oatmeal from the drugstore — it’s too processed. Grind your own from whole rolled oats.
2. The Yogurt + Turmeric Mask (For Dullness and Uneven Tone)
What it does: Brightens skin, reduces dark spots, evens texture.
The recipe: 2 tablespoons plain full-fat yogurt (Greek works best), 1/4 teaspoon turmeric powder. Mix. Apply. Leave 10 minutes. Rinse thoroughly.
Critical warning: Turmeric stains. Use an old towel. Rinse with milk first (the fat grabs the pigment), then water. If you skip this step, you’ll look jaundiced for a day.
My verdict: I use this once a week. After three months, my post-acne marks faded noticeably. The lactic acid in yogurt does the heavy lifting. Turmeric adds antioxidant protection. Don’t use fresh turmeric root — it stains worse and the particles are too large.
3. The Egg White + Lemon Juice Mask (For Pores and Firmness)
What it does: Temporarily tightens skin, minimizes pore appearance, removes surface oil.
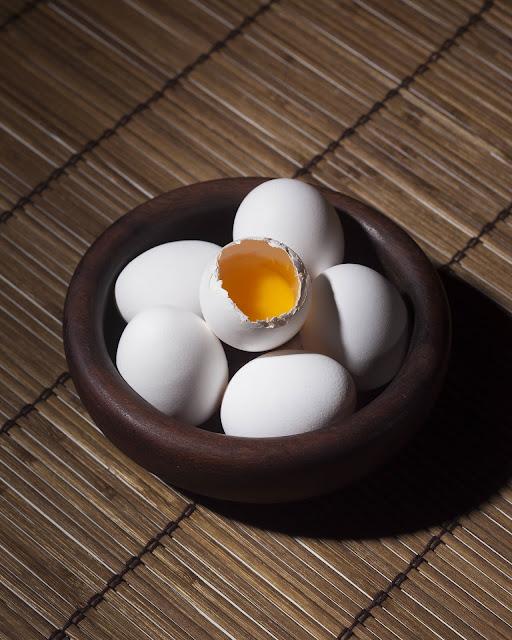
The recipe: 1 egg white, 1 teaspoon fresh lemon juice, 1 teaspoon honey. Whisk until frothy. Apply in thin layers (let each dry before next). Leave 15 minutes total. Rinse with cool water.
Why it works: Egg white contains albumin, which forms a film that contracts as it dries — giving that temporary tight feeling. Lemon juice provides vitamin C and light exfoliation.
My verdict: This mask works for 4-6 hours. Use it before an event, not as a long-term solution. The tightness is real but temporary. If you have dry skin, skip the lemon juice and just use egg white + honey. And never use this if you have broken skin or active acne — the lemon juice will sting like hell.
4. The Avocado + Olive Oil Mask (For Dry, Dehydrated Skin)
What it does: Deep moisture, repairs barrier, softens fine lines temporarily.
The recipe: 1/4 ripe avocado, 1 teaspoon extra virgin olive oil, 1 teaspoon honey. Mash until smooth. Apply. Leave 20 minutes. Rinse with lukewarm water.
Why it works: Avocado provides fatty acids (oleic, linoleic) that mimic your skin’s natural sebum. Olive oil is rich in squalene, a component of healthy skin barrier.
My verdict: Best used in winter when my skin gets flaky. It won’t reverse aging, but it plumps fine lines for the rest of the day. Don’t use this if you’re prone to breakouts — avocado and olive oil are both comedogenic. I learned this the hard way with three chin pimples.
5. The Green Tea + Aloe Vera Mask (For Puffiness and Inflammation)
What it does: Reduces morning puffiness, calms redness, provides antioxidant protection.
The recipe: 1 green tea bag (steep in 1/4 cup hot water, cool completely), 2 tablespoons pure aloe vera gel (from the plant or a clear gel like Fruit of the Earth), 1 teaspoon honey. Mix liquid and gel. Apply with cotton pads or as a sheet mask soak. Leave 15 minutes.
Why it works: Green tea contains EGCG, a potent antioxidant that reduces inflammation. Aloe vera provides cooling and hydration.
My verdict: This is my go-to morning mask before a photo shoot or event. It visibly depuffs my face in 15 minutes. Use matcha powder instead of a tea bag for stronger EGCG content. Keep the mixture in the fridge for extra cooling effect.
6. The Banana + Honey Mask (For Fine Lines and Texture)
What it does: Smooths skin texture, provides vitamins B6 and C, moisturizes.
The recipe: 1/2 very ripe banana, 1 teaspoon honey, 1 teaspoon plain yogurt. Mash banana thoroughly (no lumps). Mix in honey and yogurt. Apply. Leave 15 minutes. Rinse.
Why it works: Bananas contain potassium and vitamins that support skin cell turnover. The natural sugars provide gentle exfoliation.
My verdict: This is the weakest mask on this list. It’s pleasant, smells good, and makes skin feel soft — but it won’t transform your face. I use it when I have a banana going brown and don’t want to waste it. If you’re looking for serious anti-aging results, skip this one and use the yogurt-turmeric or oatmeal-honey-milk masks instead.
When DIY Masks Aren’t the Answer (And What to Buy Instead)
I’m not going to tell you that homemade masks fix everything. They don’t. Some problems require professional formulations.
When to skip DIY:
- Deep wrinkles and loss of elasticity. No amount of banana will replace collagen. You need retinoids or peptides. Look for CeraVe Resurfacing Retinol Serum ($18) or The Ordinary Granactive Retinoid 2% Emulsion ($10).
- Melasma or stubborn hyperpigmentation. DIY masks can lighten surface dark spots, but deep pigmentation needs prescription-strength ingredients like hydroquinone or tranexamic acid. See a dermatologist.
- Active cystic acne. Don’t put food on infected skin. You risk introducing bacteria. Use a salicylic acid cleanser like La Roche-Posay Effaclar Medicated Gel Cleanser ($15) instead.
- If you have sensitive skin. DIY means no preservatives and no controlled pH. One wrong ratio can damage your barrier for weeks. Stick with products designed for sensitive skin, like Vanicream Moisturizing Cream ($13).
I keep both DIY and store-bought in my routine. The masks handle surface texture and glow. The serums handle the deeper stuff. They’re not competing — they’re teammates.
How to Actually Get Results From DIY Anti-Aging Masks
Consistency beats intensity. One mask a week for three months will do more than a daily mask for two weeks. Here’s what I’ve learned from five years of trial and error:
Prep your skin properly. Wash your face first. Steam if you have time (hot shower works). Open pores absorb better. Don’t apply masks to dirty skin — you’re just sealing in bacteria.
Patch test everything. I don’t care if you’ve eaten that ingredient a hundred times. Your face is different from your stomach. Apply a small amount behind your ear or on your inner arm. Wait 24 hours. If it’s red or itchy, don’t put it on your face.
Timing matters. Exfoliating masks (yogurt, lemon) in the evening. Hydrating masks (avocado, oatmeal) in the morning. Your skin repairs at night and needs protection during the day. Don’t exfoliate before going outside — your skin is more vulnerable to UV damage.
Don’t overdo it. Once a week is plenty for most people. Twice if your skin tolerates it. More than that and you risk over-exfoliation, which looks like breakouts, redness, and irritation. I’ve been there. It takes weeks to recover.
Store ingredients properly. Keep honey in a sealed jar at room temperature. Yogurt and avocado in the fridge. Turmeric in a dark cabinet. Don’t use anything that smells off or has mold. I threw away a batch of oats that had been sitting open for three months — not worth the risk.
The Bottom Line on DIY Anti-Aging Face Masks
Remember that first overcomplicated turmeric disaster I mentioned? I’ve come a long way since then. DIY masks won’t replace your retinol or your dermatologist. But they can give you glowing, smoother skin for pennies per use.
The yogurt-turmeric mask is my desert island pick. It brightens, exfoliates, and costs about 30 cents per use. The oatmeal-honey-milk mask is the safest bet for sensitive skin. The egg white mask is the party trick — great for temporary tightening before an event, useless as a long-term strategy.
Start with one mask. Use it once a week for a month. Take a photo before and after. If you see improvement, add another. If you don’t, try a different recipe. Your skin changes with seasons, stress, and age. What works in January might not work in July.
And if a recipe calls for 12 ingredients and a blender? Close the tab. Your face doesn’t need a smoothie. It needs one or two smart ingredients, applied correctly, consistently. That’s the whole secret.