Blog

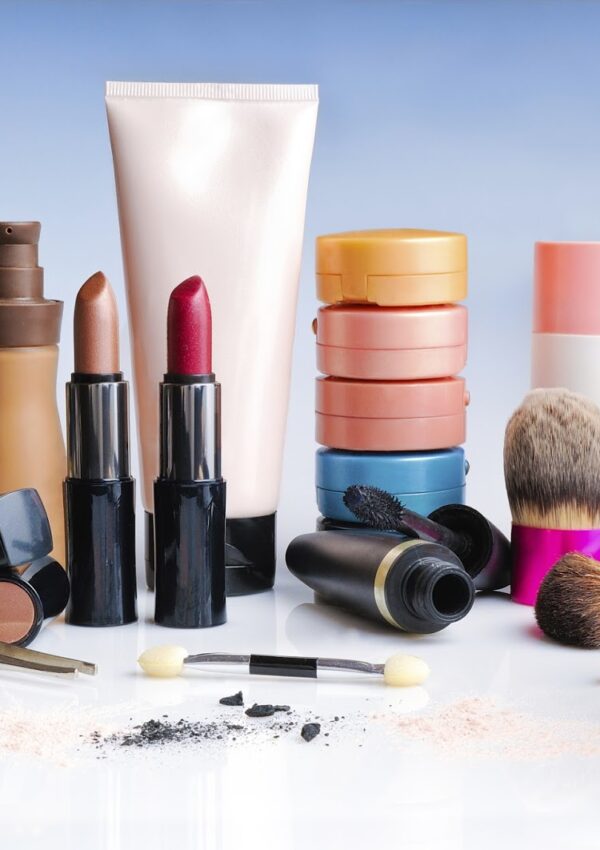
  • The Types of Makeup Brushes and Their Uses: A Comprehensive Guide

    The Types of Makeup Brushes and Their Uses: A Comprehensive Guide

    When it comes to achieving a flawless makeup look, the tools you use are just as important as the products themselves. Makeup brushes are essential for applying, blending, and perfecting your makeup. Whether you’re a beginner or a seasoned pro, understanding the different types of brushes and how to care for them can make a huge difference in your beauty routine. Today we are sharing a makeup brushes which will surely guide you and explain the world of makeup brushes. You will also be able to know their uses, and how to maintain them.

    There are a variety of makeup brushes available, each designed for a specific purpose. Listed below are some of the most known and common brushes along with their uses:

    1. Foundation Brush: Ideal for applying liquid or cream foundation, providing a smooth, even finish.
    2. Concealer Brush: Small and precise, perfect for covering blemishes and under-eye circles.
    3. Powder Brush: The powder brush is large and fluffy, it is used to apply loose or say pressed powder evenly across the face.
    4. Blush Brush: Angled or rounded, designed to apply blush to the cheeks for a natural flush.
    5. Contour Brush: Slanted bristles that fit into the hollows of your cheeks to define and sculpt.
    6. Eyeshadow Brush: Flat and dense, used to apply eyeshadow across the eyelid.
    7. Blending Brush: The bending brush is very soft and fluffy thus making it a perfect choice for blending eyeshadow seamlessly.
    8. Eyebrow Brush: Angled with firm bristles, ideal for filling in and shaping eyebrows.
    9. Lip Brush: Small and precise, used to apply lipstick or gloss with accuracy.

    Makeup Brushes Guide for Beginners

    If you’re new to makeup, starting with a basic makeup brushes set is a great idea. Here’s a simple makeup brushes guide for beginners:

    • Foundation Brush: Start with a flat or buffing foundation brush for an even application.
    • Powder Brush: A versatile brush that can be used for setting powder and blush.
    • Eyeshadow Brush: Essential for applying base eyeshadow colors.
    • Blending Brush: Crucial for creating seamless eyeshadow looks.
    • Blush Brush: Doubles as a contour brush if angled.

    Makeup Brushes Aesthetic

    The aesthetic of your makeup brushes can also play a role in your beauty routine. High-quality brushes often come with sleek, elegant designs that add a touch of luxury to your vanity. Look for makeup brushes that not only perform well but also complement your personal style. Matching handles, metallic accents, and organized brush holders can enhance the overall makeup brushes aesthetic, making your beauty routine more enjoyable.

    Makeup Brushes Cleaning

    Maintaining clean makeup brushes is essential for both your skin’s health and the longevity of the brushes. Here’s a simple guide to makeup brushes cleaning:

    1. Rinse: Wet the bristles with lukewarm water, avoiding the handle.
    2. Cleanse: Apply a gentle brush cleanser or baby shampoo, and lather the bristles.
    3. Rinse Again: Thoroughly rinse out all soap and makeup residue.
    4. Dry: Gently squeeze out excess water from the brushes and very gently reshape the bristles. Afterwards let the brushes lay flat on a towel so that they can get dry.

    Regular cleaning prevents the buildup of bacteria and ensures that your makeup application remains flawless.

    Choosing the Right Makeup Brushes Set

    Investing in a good makeup brushes set can save you time and effort in the long run. Look out for those makeup brushes sets that include a variety of essential brushes(which are mentioned above). This will ensure that you have the essential tools which are needed for different makeup looks. High-quality sets often come with a case or holder, adding to the makeup brushes aesthetic and making storage easy.

    Conclusion

    Makeup brushes are vital tools in any beauty arsenal. Understanding the different types of brushes and their uses, maintaining their cleanliness, and appreciating their aesthetic can significantly enhance your makeup routine. Whether you’re just starting out or looking to expand your collection, this makeup brushes guide aims to provide you with the knowledge you need to make informed choices. Happy brushing!

  • How to Remove Under Eye Bags: Effective Treatments and Quick Fixes

    How to Remove Under Eye Bags: Effective Treatments and Quick Fixes

    Under-eye bags are a common issue that can affect your appearance and self-esteem. These puffy areas under the eyes can make you look tired and older. If you’re seeking solutions on how to remove under eye bags, you’re in the right place. We’ll explore the causes and discuss both long-term and immediate remedies.

    What Causes Eye Bags?

    Understanding the causes of under-eye bags is key to finding the right treatment. Here are some common reasons:

    1. Aging: As we get older, the skin around our eyes weakens and the fat supporting the eyes can move into the lower eyelids, causing puffiness.
    2. Genetics: If your family members have under-eye bags, you might be more likely to have them too.
    3. Allergies: Allergic can the the reason for the same and allergic reactions can usually lead to inflammation and swelling around the eyes area.
    4. Fluid Retention: Eating salty foods or experiencing hormonal changes can cause fluid retention, leading to puffiness.
    5. Lack of Sleep: Not getting enough sleep can cause blood vessels under your eyes to dilate, resulting in dark circles and swelling.

    How to Remove Eye Bags Permanently

    For those seeking long-term solutions, here are some strategies to consider:

    • Healthy Lifestyle: Maintaining a balanced diet, staying hydrated, and exercising regularly can help reduce under-eye bags.
    • Skincare Routine: Using products with ingredients like retinol, vitamin C, and hyaluronic acid can improve skin elasticity and reduce puffiness.
    • Medical Treatments: Procedures such as laser therapy, chemical peels, and fillers can offer more permanent results. You should consult a dermatologist in order to explore these options.

    How to Get Rid of Eye Bags in Minutes

    If you need a quick fix, here are some tips to reduce eye bags in minutes:

    1. Cold Compress: Apply a cold compress or chilled spoons to your under-eye area for a few minutes. The cold compress procedure can constrict blood vessels and thus help in reducing swelling.
    2. Tea Bags: Soak tea bags in warm water, then chill them in the fridge. Place the cooled tea bags over your both you eyes for at least 10-15 minutes. The caffeine and antioxidants available in tea can help in tightening the skin and reduce puffiness.
    3. Cucumber Slices: Cucumber slices have anti-inflammatory properties. Place them on your eyes for about 10 minutes to help soothe and reduce swelling.

    Under Eye Bags Treatment Options

    Several over-the-counter treatments can help reduce under-eye bags:

    1. Eye Creams: Look for creams with caffeine, peptides, and antioxidants that can help tighten the skin and reduce fluid buildup.
    2. Masks and Patches: Gel eye masks and patches are infused with ingredients that can provide an instant cooling effect and reduce puffiness.
    3. Massaging Tools: Jade rollers and under-eye massagers can improve circulation and help lymphatic drainage, which reduces swelling.

    Additional Tips to Prevent and Reduce Under Eye Bags

    1. Sleep Position: Elevate your head with an extra pillow while sleeping to prevent fluid from accumulating under your eyes.
    2. Stay Hydrated: Drinking plenty of water helps flush out toxins and reduces fluid retention.
    3. Limit Salt Intake: Reducing your salt consumption can prevent fluid retention and minimize puffiness.

    Conclusion

    Dealing with under-eye bags can be challenging, but with the right combination of lifestyle changes, skincare products, and quick fixes, you can significantly reduce their appearance. Whether you’re looking for how to remove eye bags permanently or need to know how to get rid of eye bags in minutes, there are solutions available to meet your needs. By understanding what causes eye bags and exploring various under-eye bags treatment options, you can achieve a fresher, more youthful look.

  • Emotional Impact of Wigs on people suffering from Alopecia

    Emotional Impact of Wigs on people suffering from Alopecia

    Alopecia, or sudden hair loss, tests a person mentally and emotionally. Waking up to find chunks of hair on your pillow can break your confidence, which can further lead to anxiety and depression, making social interactions difficult for the person.

    There is always a ray of hope for people with Alopecia – a Human hair hairpiece.

    Picking a wig or toupee is not an easy decision. It should not be made in haste. Let’s dive deep into the world of alopecia and human hairpieces to learn how they are profoundly connected and how a hairpiece can help.

    Alopecia wreaks a sane mind

    Alopecia can cause stress and fear among people. Social situations and the judgments passed by people can lead to crippling anxiety. Therefore, it restricts the person from going out of the house, making their mental health deteriorate.

    Wigs are beyond aesthetics

    Wigs not only make a person look different and beautiful, but they are much more than that. They can instantly give you a full head of hair, covering your hair thinning. A study has also revealed that wearing a hairpiece can calm down the person, relieving him of stress, anxiety, and depression. Here is how it has the power.

    It acts as a shield: The hair pieces for men act as a mask that hides the visible sign of hair thinning. It reduces the fear of getting judged by people, making it easier for the person to lead an everyday life without any stress.

    Get the control back: Hair thinning conditions make a person feel helpless. Human hairpieces can make them feel like they are taking back control in their hands. This feeling is as powerful as it sounds. Every decision, from picking the wig to wearing it to styling it, makes the person feel powerful.

    Pick the human hairpiece like an expert: These tips can help you choose the best one for your needs.

    Seek professional help: People with alopecia are already struggling with a lot of issues, and choosing a hairpiece should not be another cause of concern. Get professional help online or offline before investing in one. They can help you select the one that mimics natural hair and is good quality.

    Quality is the key: A good-quality wig is always a hit. It offers a more realistic look, blends well with natural hair, does not irritate the scalp, and offers a sense of comfort to the person wearing it.

    A support system is essential. While hair systems can help the person gradually rebuild confidence, being part of a support system can help the person manage anxiety and depression. Some of the resources are mentioned below.

    Therapy is the foundation of all: It is important to take mental issues seriously. Visiting a therapist can be difficult. Take smaller steps by having regular sessions with the therapists.

    -Support groups: People connect better with those who are going through the same situation. Their stories of how they are making efforts to come out of depression and lead an everyday life motivate everyone. With local and offline support groups, people get a secure space to share their experiences without hesitation and find strength.

    -Self-care: Understanding the significance of prioritizing oneself over everybody is essential. Exercise, meditation, and yoga are some of the activities that can help in reducing stress and anxiety.

    In Conclusion, You are not alone.

    Conditions like alopecia can make you feel alone and stuck. It can be challenging, but you are not alone. Self-care practices, support, therapy, and hairpieces that suit your needs can help you win through critical times, making you strong and confident again.

    To help you on your journey, you can connect with Superhairpieces. This online store offers many human hair pieces for women and men. People from across the world have benefited from their high-quality products and services.

  • 10 Fantastic Benefits of Yogurt for Your Skin, Hair, and Health

    10 Fantastic Benefits of Yogurt for Your Skin, Hair, and Health

    Introduction:

    Hey there, yogurt lovers! You might know yogurt as that creamy and tangy delight you enjoy with your morning granola or as a base for a tasty dip. But did you know that yogurt has a treasure trove of benefits that go beyond its delightful taste? This wonder food can do wonders for your skin, hair, and overall health. In this article, we’ll dive into ten incredible benefits of yogurt in a conversational and detailed manner.

    1) A Probiotic Powerhouse:

    Yogurt is your gut’s best friend. It’s brimming with probiotics, those friendly bacteria that help keep your digestive system happy. A healthy gut can work wonders for your skin, preventing issues like acne and eczema and promoting healthy, shiny hair.

    2) Skin Hydration Galore:

    You know that satisfying feeling when you apply yogurt as a face mask? That’s the lactic acid in action, locking in moisture. It keeps your skin hydrated, making it appear youthful and radiant. Dry skin and fine lines, be gone!

    3) The Natural Skin Exfoliator:

    Thanks to lactic acid, yogurt is a natural exfoliant. It gently removes those pesky dead skin cells and unveils a brighter complexion. Plus, it helps unclog pores, reducing acne and leaving your skin smooth and rejuvenated.

    4) Sunburn Soother:

    Yogurt’s cooling properties make it a fantastic remedy for sunburn. Applying yogurt on sun-kissed skin helps relieve the pain, redness, and inflammation, all while speeding up the healing process.

    5) Say Goodbye to Acne:

    Yogurt’s antimicrobial powers are here to combat acne-causing villains. It contains zinc, a natural anti-inflammatory, which reduces redness and irritation from breakouts. With a regular yogurt mask, you can look forward to clearer, healthier skin.

    6) Promotes Hair Growth:

    Want gorgeous, healthy locks? Yogurt has got your back. It’s packed with B-vitamins, protein, and probiotics that work together to stimulate hair growth. A yogurt hair mask will strengthen your strands, reduce breakage, and give you hair worth flaunting.

    7) A Dandruff Disrupter:

    Dandruff? No more! Yogurt’s anti-inflammatory properties calm that itchy scalp. And the probiotics? They help restore your scalp’s natural balance, bidding farewell to the flakes.

    8) Tame the Frizz:

    Yogurt doubles as a natural conditioner for unruly hair. It smoothes your hair cuticles, making your mane more manageable and less prone to frizz. Say hello to sleek, gorgeous locks!

    9) Your Weight Management Buddy:

    If you’re watching your weight or trying to lose weight, yogurt can be your secret weapon. It’s loaded with protein, which keeps you feeling full and satisfied. Say goodbye to those unhealthy snacking habits.

    10) A Digestive Dynamo:

    Yogurt’s probiotics do wonders for your digestive system. They help with digestion, keep constipation at bay, and maintain a healthy gut microbiome. It’s like a daily spa day for your tummy.

    Conclusion:

    There you have it – yogurt is more than just a tasty treat; it’s a versatile and budget-friendly solution for your skin, hair, and overall health. So, don’t hesitate to incorporate yogurt into your daily routine. Whether you’re making a yogurt face mask, enjoying a yogurt parfait, or using it as a hair conditioner, you’ll be amazed at the incredible results. Embrace the yogurt revolution, and let your skin, hair, and overall well-being flourish!

  • Say Goodbye to Dandruff: 10 Best Hair Oils for Effective Treatment

    Say Goodbye to Dandruff: 10 Best Hair Oils for Effective Treatment

    Introduction

    Dandruff, a common scalp condition characterized by flaky skin, can be both embarrassing and uncomfortable. While there are various treatments available, using the right hair oil can make a significant difference in preventing dandruff and promoting a healthy scalp. In this article, we’ll explore the top 10 hair oils renowned for their effectiveness in treating dandruff, providing you with relief and confidence.

    Tea Tree Oil

    Renowned for its antifungal and antibacterial properties, tea tree oil effectively combats dandruff-causing fungi. When mixed with a carrier oil, such as coconut or jojoba oil, it creates a potent dandruff-fighting treatment.

    Neem Oil

    Neem oil, derived from the neem tree, is a powerful Ayurvedic remedy for dandruff. Its antifungal properties help alleviate itching and flaking while promoting scalp health. Mix with a carrier oil and massage into the scalp for best results.

    Coconut Oil

    Coconut oil not only moisturizes the scalp but also possesses antifungal properties that can help eliminate dandruff-causing yeast. Apply warm coconut oil to the scalp, leave it overnight, and wash off with a dandruff shampoo for effective treatment.

    Olive Oil

    Olive oil is very rich in antioxidants and vitamins. Olive oil help in nourishing the scalp and helps alleviate dandruff symptoms. Massage warm olive oil into the scalp, leave it on for at least an hour, and rinse with a gentle dandruff shampoo for optimal results.

    Castor Oil

    Castor oil is known for its moisturizing properties, making it beneficial for dry scalp conditions like dandruff. Mix with a lighter oil like almond or jojoba oil and massage into the scalp to soothe irritation and reduce flakiness.

    Argan Oil

    Argan oil, derived from the Moroccan argan tree, is rich in vitamin E and fatty acids, making it an excellent choice for nourishing the scalp and preventing dandruff. Massage a few drops of argan oil into the scalp regularly for best results.

    Jojoba Oil

    Jojoba oil closely resembles the natural oils produced by the scalp, making it an effective moisturizer for dry, flaky skin. Its antibacterial properties also help keep the scalp clean and free from dandruff-causing bacteria.

    Almond Oil

    Almond oil is lightweight and easily absorbed, making it ideal for treating dandruff without leaving a greasy residue. Its high vitamin E content promotes scalp health and prevents dryness and flakiness.

    Amla Oil

    Amla oil, derived from the Indian gooseberry, is rich in antioxidants and vitamin C, which help promote scalp health and prevent dandruff. Its nourishing properties make it a popular choice for dandruff treatment at home.

    Rosemary Oil

    Rosemary oil aids in stimulating the blood circulation in the scalp. Thus helps to promoting hair growth and preventing dandruff. Its antimicrobial properties help eliminate dandruff-causing bacteria and fungi, making it an effective treatment option.

    Conclusion

    These 10 hair oils offer effective solutions for preventing and treating dandruff, providing relief from itching, flaking, and scalp irritation. Whether you prefer traditional Ayurvedic remedies like neem oil or opt for popular choices like tea tree oil, incorporating these oils into your hair care routine can help you achieve a healthy, dandruff-free scalp. Combine regular use of these oils with a gentle dandruff shampoo for comprehensive dandruff treatment at home.

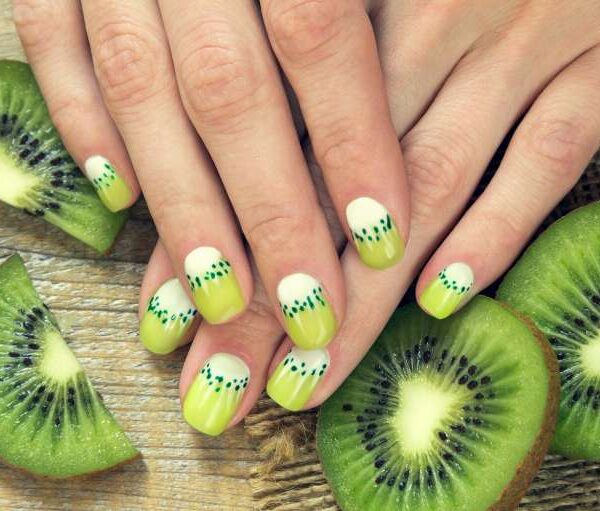
  • The Ultimate Guide to DIY Nail Art at Home

    The Ultimate Guide to DIY Nail Art at Home

    Are you tired of paying a fortune at the nail salon for intricate nail art designs? It’s time to unleash your creativity and learn how to create beautiful nail art at home. In this comprehensive guide, we will walk you through the steps, provide essential tips, and share inspiring ideas to help you achieve salon-quality nail art without leaving your house.

    1.Gather Your Supplies

    Before you begin your DIY nail art journey, it’s essential to have the right tools and supplies. You’ll need nail polish in various colors, nail art brushes, dotting tools, nail tape, and a good quality topcoat. Make sure your nails are clean and well-groomed before starting.

    2.Choose Your Design

    Whether you’re into floral patterns, geometric shapes, or abstract art, the possibilities for nail designs are endless. Explore online nail art galleries, magazines, and social media for inspiration. Start with simple designs if you’re a beginner and gradually progress to more intricate patterns.

    3.Master the Basics

    Beginners should start with basic techniques like creating stripes, dots, and gradients. Practice on a nail wheel or even a piece of paper before trying it on your nails. As you gain confidence, move on to more complex designs like ombre, marble, and 3D nail art.

      4.Step-by-Step Tutorials

      Follow step-by-step tutorials for specific nail art designs. We’ll provide detailed instructions for creating popular designs like floral nail art, galaxy nails, and French tips. Each tutorial will break down the process into manageable steps, making it easy for you to replicate the look.

      5.Nail Care Tips

      Proper nail care is essential for long-lasting nail art. Learn how to maintain healthy nails, prevent chipping, and extend the life of your nail art. We’ll also share tips on nail hygiene and safe nail art removal.

      6.Troubleshooting

      Encountering problems like smudging or uneven lines? We’ll troubleshoot common nail art issues and offer solutions to help you achieve a flawless finish.

      7.Share Your Creations

      Once you’ve mastered DIY nail art, don’t forget to showcase your creations on social media or start your nail art blog. Share your tips and inspire others in the nail art community.

        By the end of this guide, you’ll be well-equipped to create intricate and stunning nail art designs in the comfort of your home. Get ready to show off your artistic flair and impress your friends with your unique nail art creations. Say goodbye to expensive salon visits and hello to DIY nail art success!

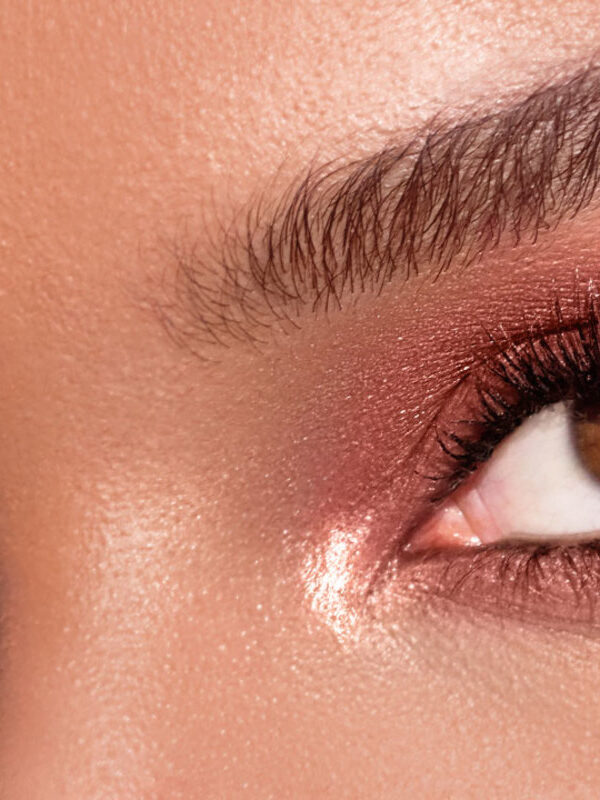
      1. A Step By Step Guide for Applying an Eye Shadow

        A Step By Step Guide for Applying an Eye Shadow

        Most people tend to say that it is not easy to apply an eye shadow or eye make-up in general. But that is not true! The only hardest part that might seem a bit challenging is the learning process on how to make the application. Once you have mastered the entire process, the rest will be simple and easy for you.

        When you are choosing an eyeshadow, you must consider some vital factors before proceeding with the purchase. You should pick the one that has the shade that compliments well with your eye color and also your skin tone. Moreover, you will also need make-up brushes for application. Ensure that you have at least two or more brushes since you will be using different shades of the eye shadow.

        With all that said; we have prepared a step by step guide for applying eye shadow that will help you to do your eye shadow correctly with much ease.

        Step 1

        • Begin with an eye primer. It aids in creating a smooth surface for the make-up on your eyes.
        • Apply a concealer once the primer is dry. The concealer enables the eyeshade to stick well when you apply.
        • You can still use a foundation or an eye shadow base in place of a concealer since they both serve the same purpose.

        Step 2

        • To rock a natural look daily; use the four shades on palette. Pick a highlighter or facial highlighter that has a lighter shade than your skin tone.
        • Remember, you should not apply your eyeliner or mascara before using the eye shadow.

        Step 3

        • Start applying the lightest shade in your eye shadow palette.
        • You need to use your eye shadow brush, soft brush eye shadow below your eyebrows and on the inner side of the eye.

        Step 4

        • In this step, apply the medium shade in your eye shadow palette.
        • On the inner corner of your eye, apply the lightest shade, and don’t forget to pat your brush before applying to eliminate excess eye shadow.

        Step 5

        • On the upper lash line, apply the darkest shade using a flat brush; making a half-moon shape.
        • To contour your eyes at the crease, always use a darker shade of your eye shadow.
        • In the inner-most corner of your eye that is where you should start from and to the outer-most apply less of the eye shadow

        Step 6

        • Pick a clean eye shadow brush that you will use to blend in your eye shadow. An important thing to note here is to ensure that you have blend the outer edges of the eye shadow that you’ve just applied to prevent uneven lines.

        Step 7

        • The final step, apply a black or brown high pencil to your waterline. Ensure that you make it thick to get that Smokey look.
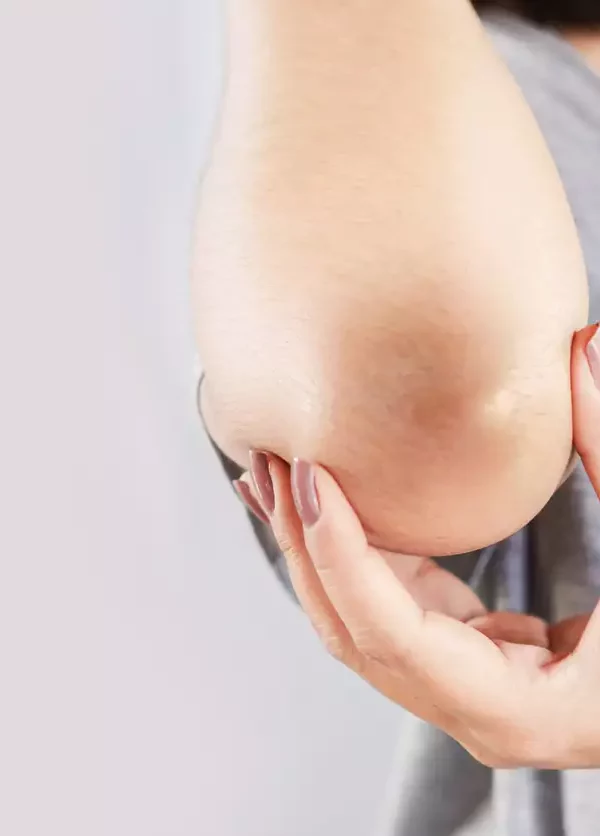
      2. 5 Tips to Lighten and Soften the Elbow Skin

        5 Tips to Lighten and Soften the Elbow Skin

        Dark spots on elbow

        For some people, the skin area around the elbow is usually notorious for appearing darkened due to a number of reasons.

        Reason behind dark spots on the elbow

        Some of the reasons that cause dark spots and skin on the elbow may include but not limited to the following:

        • Accumulation of dead skin cells
        • Dark spots from a recent pregnancy
        • Due to certain skin conditions such as eczema and psoriasis
        • Freckles and age spots
        • Inflammation as a result of an injury

        Even though these causes may affect any part of the skin in your body, the elbow is usually more susceptible due to its peculiar location. Despite the numerous risk factors associated with dark pigmentation on the elbow, there are various mitigation steps you can take at home.

        Proven home remedies to lighten dark pigmentation on the elbow

        You can easily alleviate the problem darkened elbow skin by following home beauty tips that involve the following:

        Use of baking soda

        Baking soda is a great product when it comes to home skin care regimen. It offers numerous health benefits to the skin including exfoliating as well as skin lightening properties. You can use it to help lighten a darkened elbow skin area.

        Add a teaspoon in water until you achieve the desired paste that you can then apply directly to your elbow. You are supposed to leave it on the elbow for between 10 to 15 minutes before you rinse off with clean water. For best results it is advisable for you to repeat the routine at least two times a week.

        Aloe Vera

        Aloe Vera is a plant that has been tested and found to have numerous health benefits particularly on the skin. Aloe Vera helps to lighten the skin through a process called alpha adrenergic receptor stimulation. Always use lotions and creams that contain aloe Vera and apply two times a day.

        Citrus Fruits

        Various scientific studies suggest that citrus fruits help to lighten dark skin patches that are caused by sun exposure due to vitamin C. This is the reason why most skin lightening supplements have citrus fruits as ingredients.

        What better way is it for you to benefit directly by eating citrus fruits you have in your home. Some of the citrus fruits you can eat to help lighten your elbow skin include; lemons, oranges, and passion fruits.

        Turmeric

        Turmeric is a household spice that has got lots of health benefits including skin lightening properties. If you have ground turmeric in your home, you can prepare a paste and then proceed to apply directly on your dark elbow skin area.

        Cleansing and moisturizing

        Apart from using the above listed home products as remedy, investing in the overall skin care routine would also suffice.

        Always ensure that you that you thoroughly clean your elbow skin when taking a bath. Once you are out of the bathroom and have dried yourself using a clean towel, apply a moisturizer on the elbow. This will help keep your elbow hydrated and with time help to lighten it in no time.

      3. 10 Amazing Health Benefits of Red Grapes

        10 Amazing Health Benefits of Red Grapes

        Red grapes are versatile fruits. They are beneficial in many different ways. Red grapes are excellent antioxidants. They contain a high percentage of water that keeps you hydrated. Also, they are rich in minerals and vitamins. Grapes are small and oval that grow in bunches on the vine.

        Read more below to discover red grape’s benefits.

        1.Protect Against Heart Diseases

          Grapes are super helpful in promoting cardiovascular health. The resveratrol and flavonoid components found in grapes contain properties that aid in preventing heart disorders.

          A study done in France shows that heart disease cases were fewer in France than in other places because of their high intake of red grapes and wine. Red grapes contain no cholesterol or saturated fat hence a heart-friendly snack.

          2.Improve Immune System

            When it comes to boosting the immune system, red grapes are essential. The antioxidants and polyphenols in grapes protect the function and health of the cell, which is essential to your immune system. They are a great source of vitamin C, which might aid your immune system in fighting against infections and bacteria. Hence no frequent visits to the healthcare facility.

            3.Anti-ageing

              If you’re searching for something that will help you maintain your flawless, youthful look for a bit longer, start eating grapes for a balanced diet. The compound resveratrol in red grapes may help to slow down aging. Resveratrol also helps in maintaining your skin health.

              4.Promote Skin Health

                The resveratrol component found in grapes has been gaining demand in the cosmetic market. This is because the component helps repair collagen and protect against UV damage from the sun. The amounts of vitamin A and C in grapes protect the skin from toxin damage or pollution.

                5.Helps in Cancer Treatment

                  Grapes help in the treatment of cancer which is one of the chronic diseases in the world today. Resveratrol compound has shown a positive impact on controlling cancer, especially skin cancer, since it protects the skin from UV damage from the sun. Studies indicate that patients are undergoing chemotherapy or having side effects get relief from drinking frozen grapes. Moreover, the many antioxidants in grapes aid in fighting off radicals that may destroy the cell and cause cancer.

                  6.Improves Eyesight

                    If you’re experiencing eye problems, may grapes your everyday snack. They will help you since they lower the inflammatory protein levels and increase the retina’s protective proteins. The lutein and zeaxanthin antioxidants help promote a healthy eye and sight performance and prevent eye-related disorders due to age.

                    7.Promote Brain Health

                      A study shows that eating red grapes promotes healthy metabolic activity in patients with cognitive problems. The super-powerful antioxidant resveratrol helps speed up your mental responses and ability. Also, it reduces oxidative stress, which positively affects the brain.

                      8.Antibacterial Activity

                        Red grapes contain antiviral elements that help to fight infections, poliovirus, and herpes simplex virus. They promote your overall primary health.

                        9.Help in Weight Loss

                          Yes, this is true; if you’re looking to lose weight or gain weight, grapes are the answer. Naturally, grapes have low calories hence a healthy diet. Eating them will significantly help your weight loss process, and there is no harm if you eat many, for this is even best. The saponins in the grape’s skin aid in storing cholesterol and preventing it from being stored in the blood.

                          10.Helps in Kidney Disorder

                            Grapes are the best in reducing uric acid. Additionally, they also help in removing the uric acid from your body system and reduction of pressure on the kidneys.

                          1. Understanding Armpit Rash: Causes and Effective Remedies for Relief

                            Understanding Armpit Rash: Causes and Effective Remedies for Relief

                            Introduction

                            Armpit rash, though common, can be an uncomfortable and irritating condition. From redness and itching to swelling, this article explores the causes behind armpit rashes and suggests effective remedies to alleviate discomfort and promote healing.

                            Causes of Armpit Rash

                            Friction and Irritation: Tight clothing, especially in hot and humid conditions, can cause friction, leading to chafing and irritation.

                            Allergies: Allergic reactions to deodorants, antiperspirants, or laundry detergents can result in armpit rashes.

                            Fungal Infections: Warm and moist armpits can become a breeding ground for fungi, causing conditions like candidiasis or ringworm.

                            Bacterial Infections: Bacteria, such as Staphylococcus aureus, can lead to infections, resulting in redness and discomfort.

                            Preventive Measures

                            Choose Breathable Fabrics: Opt for loose-fitting, breathable fabrics like cotton to minimize friction and promote air circulation.

                            Maintain Good Hygiene: Regularly clean your armpits with a mild soap and water to remove bacteria and fungi, preventing infections.

                            Patch Test Products: Before using new deodorants or laundry detergents, conduct a patch test to ensure you’re not allergic to any ingredients.

                            Home Remedies for Armpit Rash

                            Cold Compress: Apply a cold compress to reduce inflammation and soothe itching.

                            Aloe Vera Gel: Known for its anti-inflammatory properties, aloe vera gel can provide relief from redness and irritation.

                            Tea Tree Oil: Diluted tea tree oil has antifungal and antibacterial properties, making it effective against infections.

                            Oatmeal Baths: Soak in an oatmeal bath to relieve itching and promote skin healing.

                            Over-the-Counter Treatments

                            Hydrocortisone Cream: Mild hydrocortisone cream can help reduce inflammation and itching.(Please consult a doctor before using any medicines or medicated creams).

                            Antifungal Creams: Over-the-counter antifungal creams containing clotrimazole or miconazole can combat fungal infections.

                            When to Seek Medical Attention

                            If the rash persists despite home remedies.

                            If there are signs of infection, such as pus or increasing redness.

                            If you experience fever or other systemic symptoms.

                            Precautions for Future Prevention

                            Regularly change out of wet or sweaty clothing.

                            Choose hypoallergenic personal care products.

                            Keep the armpit area dry and well-ventilated.

                            Consulting a Healthcare Professional

                            If home remedies and over-the-counter treatments are ineffective.

                            If the rash worsens or spreads.

                            If you have a pre-existing medical condition that may contribute to the rash.

                            Conclusion

                            Armpit rash can be a bothersome condition, but understanding its causes and implementing effective remedies can bring relief. By adopting preventive measures, utilizing home remedies, and seeking medical attention when necessary, individuals can address armpit rashes and promote overall skin health. Remember that individual responses to treatments may vary, and consulting with a healthcare professional is crucial for persistent or severe cases.